If you run Office 365 and use Directory sync to push Active Directory objects to Microsoft Online then you’ll likely know that if you want to make a change to a mailbox, contact or distribution group, then it needs to be done on that object within AD.
This is great, and Directory Sync is a brilliant idea but it seems to have a slight pitfall; It assumes that you’ve previously had Exchange deployed… Dirsync wants to sync Exchange AD Attributes
As an Example; You may have run into an instance where you’ve wanted apply settings such as delivery options or mail tips to a distribution group; Searching through Active directory yields no results for the correct attribute so the the setting has to be changed online/via powershell? Wrong:
Error: The action ‘Set-DistributionGroup’, ‘RequireSenderAuthenticationEnabled’, can’t be performed on the object ‘RESDEVManagers’ because the object is being synchronized from your on-premises organization. This action should be performed on the object in your on-premises organization.
Now, in order to set this attribute manually I could set the MsExchRequireAuthToSendTo to ‘true’ from the attribute editor in Active Directory Users and Computers (or ADSI)… But I don’t have Exchange, I never had exchange and therefore I don’t have that attribute in my AD schema.
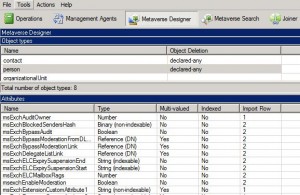
This Microsoft KB article (http://support.microsoft.com/kb/2256198) explains what AD attributes are referenced and written to/from AD and a quick look in the FIM Metaverse designer confirms this:

- You could manually create the attributes from ADSI edit and set them to the correct Type as per FIM’s Metaverse designer – Messy and could cause issues
- Run the Exchange 2010 Installation and extend your AD schema to include all MsExch* attributes so you can set them from ADUC/Powershell/Some other management tool
We’ll opt for the 2nd option (its easier and automated) – Let’s get started:
- Download the Exchange 2010 Trial media from here. Run the executable and extract the files to a temp location.
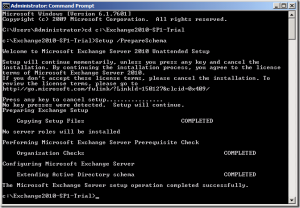
- Ensure your account is a member of Enterprise Admins and Schema Admins in Active directory. Change Directory to your extracted Installation media and run the following: Setup /PrepareSchema

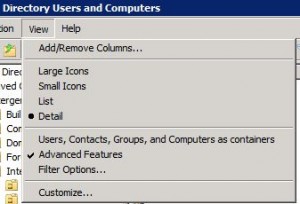
Wait for the tool to complete. - Open up Active Directory Users and Computers and enable View > Advanced features (If you haven’t already).

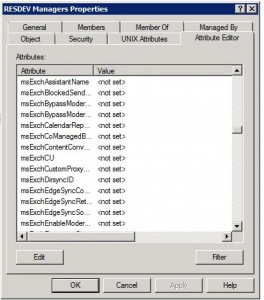
- Locate an object from the AD tree and click the Attribute Editor Tab and Scroll down to MSExch- ; Your AD Schema has been extended successfully and you now have a bit more control over objects in Office 365.

Hopefully everything’s there and the process went smoothly
You can go ahead and edit MsExchServerHintTranslations for Mailtips and MSExchRequireAuthtoSendTo for Distribution group send as permissions (as two examples)
-Patrick
