Cloudflare Workers – Maintenance Mode static page

About a month ago Cloudflare announced the general availability of Cloudflare Workers, a new feature to compliment the existing Cloudflare product offering which allows the execution of JavaScript at the edge of Cloudflare’s CDN prior to the request hitting your own web infrastructure.

Cloudflare Workers runs JavaScript in the Google V8 engine developed for Chrome that can handle HTTP traffic written against the Service Worker API – This means they effectively sit in the middle of the request pipe-line to intercept traffic destined to your origin, from there they are able to manipulate the request in just about any way you see fit.

In this post I’m demonstrating how a worker could be used to respond to web-requests, and display a static maintenance-mode page whilst a website has been taken offline for deployment (whilst permitting certain to IP’s to pass through for testing purposes). Obviously, this one example but I thought it would be a neat idea to replace the F5 maintenance iRule I wrote about in a previous post.

An example execution workflow:

  1. Maintenance mode Worker code deployed to Cloudflare and appropriate routes are created
  2. Deployment pipe-line begins – PowerShell script calls Cloudflare API and enables the worker for specific routes
  3. Cloudflare intercepts all requests to my website and instead responds with the static under maintenance page for ALL URL’s
  4. Deployment pipe-line completes – PowerShell script calls Cloudflare API and disables the worker for specific routes
  5. Web requests for my website now flow down to the origin infrastructure as per normal

Easy right? Lets work through the deployment of it.

The rule logic:

The worker rule example is pretty simple! – Intercept the request, If the contents of the cf-connecting-ip header is a trusted IP address then allow them to down to the origin for testing purposes. If cf-connecting-ip is a non-trusted IP address then show the static maintenance page (note the omitted/highlighted images in the example below, see repo for full source):

addEventListener("fetch", event => {
  event.respondWith(fetchAndReplace(event.request))
})

async function fetchAndReplace(request) {

  let modifiedHeaders = new Headers()

  modifiedHeaders.set('Content-Type', 'text/html')
  modifiedHeaders.append('Pragma', 'no-cache')


  //Return maint page if you're not calling from a trusted IP
  if (request.headers.get("cf-connecting-ip") !== "123.123.123.123") 
  {
    // Return modified response.
    return new Response(maintPage, {
      headers: modifiedHeaders
    })
  }
  else //Allow users from trusted into site
  {
    //Fire all other requests directly to our WebServers
    return fetch(request)
  }
}

let maintPage = `

<!doctype html>
<title>Site Maintenance</title>
<style>
  body { 
        text-align: center; 
        padding: 150px; 
        background: url('data:image/jpeg;base64,<base64EncodedImage>'); 
        background-size: cover;
        -webkit-background-size: cover;
        -moz-background-size: cover;
        -o-background-size: cover;
      }

    .content {
        background-color: rgba(255, 255, 255, 0.75); 
        background-size: 100%;      
        color: inherit;
        padding-top: 1px;
        padding-bottom: 10px;
        padding-left: 100px;
        padding-right: 100px;
        border-radius: 15px;        
    }

  h1 { font-size: 40pt;}
  body { font: 20px Helvetica, sans-serif; color: #333; }
  article { display: block; text-align: left; width: 75%; margin: 0 auto; }
  a:hover { color: #333; text-decoration: none; }  


</style>

<article>

        <div class="background">
            <div class="content">
        <h1>We&rsquo;ll be back soon!</h1>        
            <p>We're very orry for the inconvenience but we&rsquo;re performing maintenance. Please check back soon...</p>
            <p>&mdash; <B><font color="red">{</font></B>RESDEVOPS<B><font color="red">}</font></B> Team</p>
        </div>
    </div>

</article>
`;

Deploy the Worker

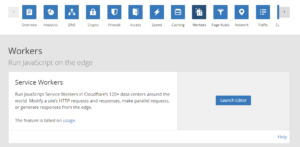
To deploy the above rule – Select Workers from the Cloudflare admin dashboard under one of your domains and launch the editor:


Add the worker script into the script body.
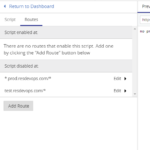
Select the Routes tab and individually add the routes you want to display the maintenance page on (note you can use wild-cards if required:

To enable your maintenance page – it’s as simple as toggling turning the route on, within minutes Cloudflare will deploy your JavaScript to their edge and invoke it for any request that matches route patterns you previously set. The maintenance page will display to everyone accessing your site externally, whilst you are still able to access due to your white-listed address:


Just like Cloudflare’s other services, Workers are able to be configured and controlled using their V4 API – We can toggle the Workers status using a simple PowerShell call. e.g:


#Generate JSON payload + convert to JSON (Setting as a PSCustomObject preserves the order or properties in payload):
		$ApiBody =  [pscustomobject]@{
			id = $workerFilterID
			pattern = "resdevops.com/*"
			enabled = $true	
		}|Convertto-Json

Invoke-RestMethod -Uri "https://api.cloudflare.com/client/v4/zones/$($zoneId)/workers/filters/$($workerFilter.Id)" 
			-Headers $headers -Body $ApiBody -Method PUT -ContentType 'application/json'

I’ve published the full source along with a script to toggle the maintenance using PowerShell and the Cloudflare API here https://github.com/coaxke/CloudflareWorkersMaintenance

Workers are pretty powerful, and there’s plenty you can do at Layer7! 🙂

Maintenance page background: pxhere.com

Windows Server App-Fabric “failed to connect to hosts in cluster”

I’ve just completed the process of building a new AppFabric Cluster on version 1.1 with a SQL backend over an existing XML Based 1.0 cluster… The new version appeared to fix a lot of issues that existed in V1.0, plus by installing a Cumulative Update  you are able to use Windows Server 2012 standard to host a Highly Available cache cluster (now that it includes cluster functionality that only previously existed in Server Enterprise in 2008/R2)

Fortunately my old automated deployment scripts did not need that much tweaking aside from the obvious changes required to use a SQL server to store the configuration + changing my secondary cache count for scaling.

After the script established the Cache Cluster and added the host I ran into an issue when attempting to start the cluster to add the individual caches and assign permissions, I got the following error: “Use-CacheCluster : ErrorCode<ERRCAdmin040>:SubStatus<ES0001>:Failed to connect to hosts in the cluster


cache-error
 

There appeared to be no real help on MSDN  to help me solve my problem… A bit of research yielded the following fixes:

  1. Ensure that the AppFabric Cache Host can resolve itself (and other Cache Lead-Hosts) via DNS, Hosts Files etc.
  2. Ensure that the Remote Registry Service has been started and the rule “Remote Service Management (NP-In)” on the Windows Firewall rule is allowed.
  3. Ensure that Firewall rules exist to allow App-Fabric communication (e.g. Port 22233 for cache port, 22234 for Cluster port etc).

My script opened firewall ports but didn’t start the remote registry service… After starting this service and reconfiguring my cache once more everything came online – I was able to add all all of my cache nodes to my brand new cluster.

Office 365 Search and Delete mail using Powershell

A neat feature of Exchange is the ability to run up a search across mailboxes within an organization from Powershell using the Search-Mailbox cmdlet and delete inappropriate or harmful messages using the -DeleteContent parameter. Fortunately these features exist in Office 365 if you are an Exchange Online Administrator

While administrators can use the Multi-Mailbox search feature in the Exchange control panel UI to locate mail, you  may discover you are unable to remove messages directly without some PowerShell magic.

The below script requires you add your admin account to the “Discovery Management” role from Roles & Auditing on the Exchange Control Panel (ECP).

#Every mailbox within the Organisation

#ARGS
[string]$decision = "n"

Write-Host "This script requires the `"Discovery Management`" Exchange Role-Group PLUS `"Mailbox Import Export`" Role assigned to your Exchange onlineAdmin Account `nPlease add it before proceeding:"
Write-Host "`n`nEnter Administration Credentials"

$LiveCred = Get-Credential

#Pass Creds to Outlook.com and generate PS Session
$Session = New-PSSession -ConfigurationName Microsoft.Exchange -ConnectionUri https://ps.outlook.com/powershell/ -Credential $LiveCred -Authentication Basic -AllowRedirection
#Import PS Session/Grab MSOL Cmdlets
Import-PSSession $Session

$Subject = Read-Host "Please Enter a Message Subject to be deleted from ALL mailboxes:"

$decision = Read-Host "Are you sure youi want to delete messages with the subject " $Subject " (Y/N)?"

if ($decision -eq "y")
	{
	Write-Host "Deleting" $Subject
	Get-Mailbox -ResultSize unlimited | Search-Mailbox -SearchQuery "subject:$Subject" -DeleteContent -Confirm
	}
else
	{
	Write-Host "Nothing deleted"
	}
Remove-PSSession

Write-Host "Connection to MSOL closed"

Warning: Use the above script with caution; When using the DeleteContent parameter, messages are permanently deleted from the user’s mailbox and cannot be recovered. (It could also take some time to run over a big Office365 Tenant)

See related Office 365 help article here:  here: http://help.outlook.com/en-ca/140/gg315525.aspx

-Patrick

Manual WSUS Sync using Powershell

A quick blog post tonight:

When setting up WSUS, its common practice to trial updates internally  prior to deployment across an entire environment…

For a recent WSUS setup I completed we decided to leave auto update approval on for all Windows Critical & Security updates so they could be tested after release every Patch Tuesday. After Microsoft’s recent spate of Out-Of-Band updates we were finding that machines were being updated half way through a month due the limited update controls you have with WSUS… We could opt to manually sync updates or select the longest time between syncs of “check once every 24 hours”.

Using some cool tips from the Hey Scripting Guy Blog I’ve slapped together this script that now runs as a scheduled task to download updates once a month on Patch Tuesday.

This is an impractical approach to updating, critical updates should be applied as soon as possible, however forcing a manual WSUS update could come in handy for a select few:


$ErrorActionPreference = "SilentlyContinue"

# WSUS Connection Parameters:
[String]$updateServer = "WSUS.resdevops.com"
[Boolean]$useSecureConnection = $False
[Int32]$portNumber = 80

# Load .NET assembly
[void][reflection.assembly]::LoadWithPartialName("Microsoft.UpdateServices.Administration")

# Connect to WSUS Server
$Wsus = [Microsoft.UpdateServices.Administration.AdminProxy]::getUpdateServer($updateServer,$useSecureConnection,$portNumber)

# Perform Synchronization
$Subscription = $Wsus.GetSubscription()
$Subscription.StartSynchronization()

Write-host “WSUS Sync Started/Queued; Check WSUS console or Event log for any Errors.”;

-Patrick

Remote logoff all Windows users with Powershell

An annoyance for anyone when running a large scripted software release is when the deployment fails half way through because someone has left a logged-on Windows session with an Open file or Window. You may then need to invest large amounts of time identifying the cause, reverting changes that only deployed half-way and eventually re-run the release package…

In one of my earlier blog posts I explained how I would drop servers into maintenance mode when running a software deployment to prevent being spammed by Operations Manager Alerts… I targeted my specific environment in SCOM using a filter that would only add servers with a NetBIOS name starting with PROD or TEST.

I have quickly whipped up something similar to boot all users off of servers (log-off) prior to executing release package. The snippet below will grab all servers in the “Servers OU” on active directory and throw them into an array. It will then enumerate each server and use the Inbuilt “MSG” command (similar to NET SEND) to warn each user logged onto servers to save their work and log off (along with a countdown timer). Once the timer hits zero the Win32Shutdown() WMI method is run to Force log-off all users so the deployment can proceed

This script could easily be turned into a function that passed along a parameter for Prod/Test/Dev environments.

Enjoy…

#Load Active Directory Module
Import-Module ActiveDirectory;

[int]$timeleft = 5 #Countdown time until Logoff (Mins)
[System.Reflection.Assembly]::LoadWithPartialName("System.Diagnostics")
$countdowntimer = new-object system.diagnostics.stopwatch

#Establish prodservers array + Enumerate all servers with a name starting with "PROD" and add to array
[array] $prodservers= @()
Get-AdComputer -filter 'Name -like "PROD*"' -SearchBase "OU=Servers,DC=resdevops,DC=com" -Properties "Name" | foreach-object {
$prodservers += $_.Name
}

while($timeleft -gt 0)
 {
	$countdowntimer.start()
	foreach ($server in $prodservers) {msg * /SERVER:$server "A software deployment is scheduled for the PROD environment; Your remote session will be logged off automatically in $timeleft minutes, you should save your work."}
	while ($countdowntimer.elapsed.minutes -lt 1) {write-progress -activity "Elapsed Time" -status $countdowntimer.elapsed}
	$countdowntimer.reset()
	$timeleft--
 }

#Once countdown is complete - Run Win32Shutdown WMI method with the "4" value 
#to force loggof  all users
foreach ($server in $prodservers) 
{
	Write-Host "Logging all users off of $server"
	(gwmi win32_operatingsystem -ComputerName $server).Win32Shutdown(4)
}
Write-Host "`n`nSent Logoff command to $($prodservers.count) servers" -foregroundcolor Green;

-Patrick

Add Proxy Addresses via PowerShell to Office 365 Users

Its safe to say that one of the most useful features of Office 365 from an administrative point of view is Directory-Sync via Forefront Identity Manager (FIM).

When given the task to add a new email alias/address to all users, we can simply add to the existing Proxy Address attribute in Active directory programmatically through PowerShell (and sync it up to the cloud using FIM). The code snippit below will take the take each users first& last names plus the $proxydomain to add “smtp:[email protected]” to their AD user object if they reside in $usersOU.

If the “Coexistence-Configuration” PSSnapin exists on the running system a manual directory sync will be initiated.


#Args
[string]$proxydomain = "@resdevops.com"; #Proxy domain
[string]$usersOU = "OU=Staff_Accounts,DC=resdevops,DC=com"; #OU to apply changes
[string]$powersnapin = "Coexistence-Configuration"; #Directory Sync PS-Snapin name
[int]$count = 0 ;

Import-Module ActiveDirectory

	Get-ADUser -Filter "*" -SearchScope Subtree -SearchBase "$usersOU" -Properties ProxyAddresses, givenName, Surname | foreach-object { 

	Write-Host "Editing user: $_.SamAccountName"

		if ($_.Proxyaddresses -match $_.givenName+"."+$_.Surname+$proxydomain)
		{
			Write-Host "Result: Proxy Address already exists; No action taken."
		}
		else
		{
 			Set-ADUser -Identity $_.SamAccountName -Add @{Proxyaddresses="smtp:"+$_.givenName+"."+$_.Surname+$proxydomain}
			Write-Host "Result: Added proxy address to Account"
			$count++
		}
	}
	#Execute Office 365 Directory Sync if possible
	$CheckSnapin = Get-PSSnapin -Registered $powersnapin -EA SilentlyContinue
	if ($CheckSnapin)
		{
			Add-PSSnapin Coexistence-Configuration;
			Start-OnlineCoexistenceSync
			Write-Host "`n `n ******Added proxy address with DirSync******"
		}
		else 
		{
			Write-Host "`n `n ******Added Proxy address; Please initiate a Directory Sync Manually******"
		}
Write-Host "Sucessfully Edited" $count "users"

-Patrick

SCOM Remote Powershell Maintenance Mode

I’m currently working a neat project with a nice automated deployment process – The Deployment (Powershell) does everything from configuring IIS to Updating SQL with Delta schema changes etc. One of the problems for the people in charge of Ops Manager (or those on-call for that matter) is that they will be spammed with Alert emails if the appropriate servers are not dropped into Maintenance mode when this deployment is run.

The team deploying the latest build don’t want mucking around with SCOM while trying to focus on a Prod release for exmple – What we do… Set appropriate servers to maintenance mode at the start of a deployment and pull them out once its complete. Here’s how we do it:

  1. Establish a new SCOM Group which our Maintenance Mode script will target when run.:
    Each server name in our environment is prefixed with its environment type e.g. PRODWEB1, TESTAPP2, PRODSQL1, etc. I’ve setup a Dynamic group with the following rule to target “PROD” machines (and another for test): ( Object is Windows Computer AND ( NetBIOS Computer Name Contains PROD ) AND True )
  2. Enable PowerShell remoting on SCOM server so we can utilize the OpsManager Powershell Cmdlets:
    Enable-PSRemoting -force
  3. Add the appropriate Powershell snippits (or add them as functions) to your deployment to enter and Exit Maintenance Mode:

To Enter Maintenance Mode:

enter-pssession -computername scomserver.resdevops.com
invoke-command -computername scom1.resdevops.com -scriptblock {

Import-Module OperationsManager
$Instance = Get-SCOMGroup -displayname "PRODSERVERROUPNAME" | Get-SCOMClassInstance
$Time = ((Get-Date).AddMinutes(30))
Start-SCOMMaintenanceMode -Instance $Instance -EndTime $Time -Reason "PlannedOther" -Comment "Code Deployment"

}
Exit-Pssession

Exit Maintenance Mode:

enter-pssession -computername scomserver.resdevops.com
invoke-command -computername scom1.resdevops.com -scriptblock {

import-module operationsmanager
$Instance = Get-SCOMGroup -displayname "PRODSERVERGROUPNAME" | Get-SCOMClassInstance
$MMEntry = Get-SCOMMaintenanceMode -Instance $Instance
$NewEndTime = (Get-Date)
Set-SCOMMaintenanceMode -MaintenanceModeEntry $MMEntry -EndTime $NewEndTime -Comment "Deployment Complete - Maintenance mode disabled"
}
Exit-Pssession

Let me know if you have any Questions.

-Patrick